

Project Mu is a Microsoft-sponsored open-source UEFI BIOS implementation, complementing the original Tianocore open-source implementation. Tianocore is considered an "upstream remote" as far as Project Mu is concerned.
Project Mu is a modular adaptation of TianoCore's edk2 tuned for building modern devices using a scalable, maintainable, and reusable pattern. Mu is built around the idea that shipping and maintaining a UEFI product is an ongoing collaboration between numerous partners. For too long, the industry has built products using a "forking" model combined with copy/paste/rename and with each new product, the maintenance burden grows to such a level that updates are near impossible due to cost and risk.Project Mu also tries to address the complex business relationships and legal challenges facing partners today. To build most products, it often requires both closed-source, proprietary assets as well as open-source and industry-standard code. The distributed build system and multi-repository design allow product teams to keep code separate and connected to their original source while respecting legal and business boundaries.Project Mu originated from building modern Windows PCs but its patterns and design allow it to be scaled down or up for whatever the final product's intent. IoT, Server, PC, or any other form factor should be able to leverage the content.
I won't delve into the details of Project Mu, since it's been around for almost three years already. If you'd like more background, please see:
What I'd like to do in this article is to describe how you can get Project Mu downloaded, compiled, and running quickly.
Prerequisites
Project Mu lists the prerequisites for building the code at: https://microsoft.github.io/mu/CodeDevelopment/prerequisites/
I installed the following (Windows-based) prerequisites:
- QEMU (https://www.qemu.org/download/#windows)
- Python (https://www.python.org/ftp/python/3.8.2/python-3.8.2-amd64.exe)
- git (https://github.com/git-for-windows/git/releases/download/v2.25.1.windows.1/Git-2.25.1-64-bit.exe)
- VisualStudio 2019 (https://aka.ms/vs/16/release/vs_buildtools.exe)
I installed the VS2019 package with the command-line provided by the wiki:
vs_buildtools.exe --quiet --wait --norestart --nocache --installPath C:\BuildTools \
--add Microsoft.VisualStudio.Component.VC.CoreBuildTools --add Microsoft.VisualStudio.Component.VC.Tools.x86.x64 \
--add Microsoft.VisualStudio.Component.Windows10SDK.17763 --add Microsoft.VisualStudio.Component.VC.Tools.ARM \
--add Microsoft.VisualStudio.Component.VC.Tools.ARM64
Next, I did a git clone of mu_tiano_platforms:
https://github.com/microsoft/mu_tiano_platforms.git
Building
Microsoft Project Mu maintains fourteen git repositories on Github. The build instructions for each repository varies, and are described in each repository. So, for mu_tiano_platforms, I used these instructions:
I'll walk through, step-by-step, what I did, and highlight mistakes I made in hopes you can avoid them and get started more quickly.
Step 1: Create a Python Virtual Environment
Step 2: Activate Virtual Environment

Step 3: Install Pytools

Step 4: Initialize & Update Submodules (using VS2019)

Step 5: Initialize & Update Dependencies

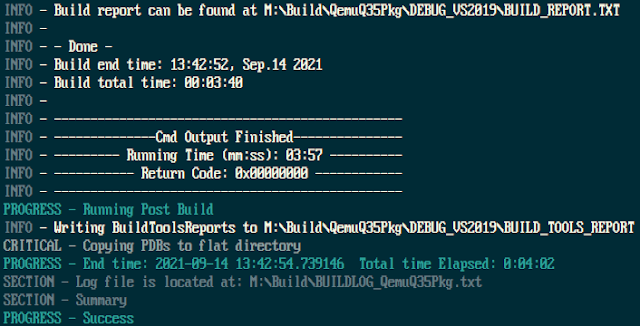
Step 6: Compile — SUCCESS!
stuart_build -c Platforms/QemuQ35Pkg/PlatformBuild.py TOOL_CHAIN_TAG=2019
Step 7: Launch QEMU
Finally, now that the prerequisites have been met, the code is cloned and built, we can launch the QEMU emulator and actually boot the firmware image we built to a UEFI shell. Make sure you manually add the QEMU install directory (i.e. C:\Program Files\qemu) to your path. Run this command:

An Error: Name Too Long
Note that I did run into a path-length issue. I didn't think my path was excessive (47 characters), but I got the following error:

To get around it, I did:
Then I ran the commands from the M: drive, and everything worked.
Conclusion
So, there you have it. As I mentioned, there are ~fourteen git repositories related to Project Mu, and they can be combined in various ways, depending on your needs. They all have various features and options, which are documented on the documentation site and in the repositories themselves. My goal was just to introduce the concept, and get you building and running a platform; I think mu_tiano_platforms is a good candidate for that. You can expand from here, for example by running the unit tests or adding optional features.
Leave a comment and let me know what you're doing with Project Mu!

Post a Comment
Be sure to select an account profile (e.g. Google, OpenID, etc.) before typing your comment!